Friday, September 30, 2011

Brown bread ice cream

  Brown bread ice cream might sound weird but it’s actually one of the best flavours ever invented. Fact. Crumbs are caramelised in the oven with brown sugar and butter until gooey malt; the edges crisp and the centre remains soft so the final effect is like Ben and Jerry’s cookies n cream with chewy, dough-like pieces flecked throughout.

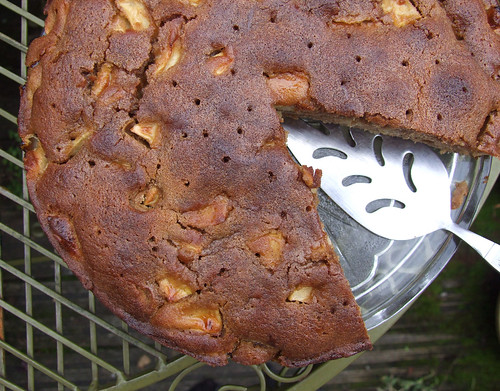
I got thinking along the lines of toast and jam; lots of nutty caramel from the crumbs and a ripple of sweet (high-fruit) raspberry jam running through. This is about as old English as it gets: a Victorian recipe with a ripple in it. Gawjuss.
Brown bread ice cream with a raspberry jam ripple (I used Keiko’s recipe as a starting point)
4 medium egg yolks
45g caster sugar
1/2 tablespoon vanilla paste (I used Nielsen-Massey vanilla paste from a jar but you can use half a vanilla pod or a little vanilla extract)
80g crust-less wholemeal bread (make sure it doesn’t have any seeds)
1 teaspoon cornflour
250ml semi-skimmed milk (use whole if you want to but I don’t think it necessary for this recipe)
40g butter
50g light brown sugar
250ml double cream
High-fruit raspberry jam (not too much sugar basically), for rippling
Preheat the oven to 180C
Whiz up the bread to make crumbs. Melt the butter then mix it with the crumbs and light brown sugar. Spread this mixture out on a baking sheet and bake for about 15 minutes, until the crumbs are crisp. They may remain a bit soft and chewy in the middle but this is a good thing. Allow them to cool completely then break them up into crumbs again; make sure to leave some big bits.
Pour the milk into a heavy-based saucepan, add the vanilla paste and bring to the boil. Remove from the heat and leave for 15 minutes to infuse.
In an electric mixer or in a large bowl with a hand whisk, beat the egg yolks, sugar and cornflour until thick and pale. Pour over the hot milk very slowly, whisking constantly. Return the mixture to the pan and cook it over a very gentle heat, stirring all the time. After a while the custard will begin to thicken slightly; when it coats the back of a spoon it is ready. Cover with a cartouche of greaseproof paper and leave to cool.
Stir the cream into the custard, tip into an ice cream machine and churn until thick. Stir the crumbs into the mixture, churn for 5-10 minutes until ready to serve. If you let your ice cream get too thick before you’ve added the crumbs, just stir them in by hand. Tip your ice cream into a freezer proof tub. If your ice cream is rather soft at this point, stick it in the freezer for an hour before adding your ripple. To add the ripple, take a tablespoonful or so of the jam and put in a bowl, mix it very well with a spoon to loosen it up. Put dollops of the jam on top of the ice cream and use a skewer to create a ripple effect.

Wednesday, September 28, 2011

Bircher Muesli

  I never thought I’d find myself writing about muesli. The word brings to mind bowls of dusty old oats that either catch in your throat or have you chewing each mouthful for an eternity; the bland food of Health Freaks and Nutrition Nuts, more punishment than breakfast.
Bircher (let’s not call it ‘muesli’) is different because the oats are soaked overnight in apple juice (use cloudy juice for the best flavour) and by morning they have plumped and sweetened. I then add creamy natural yoghurt (full fat, please), grated apple and mix it all together before topping with whatever I around; this morning it was pomegranate seeds and pistachios. Yesterday it was sliced bananas, toasted coconut, sunflower seeds and a good drizzle of runny honey.
This is the only breakfast that has ever been able to keep me going right through until lunch and that’s saying something because even after a full English I’ll be ready for snacking at 11am.
Bircher Muesli
About 50g rolled oats
Enough apple juice to cover the oats
A couple of tablespoons of thick, natural yoghurt
Half an apple
Whatever toppings you fancy. Banana, hazelnuts, almonds, pistachios, sunflower seeds, pumpkin seeds, pomegranate seeds, seasonal berries, whatever.
A drizzle of honey.
Combine the oats and apple juice and leave to combine for at least an hour but preferably overnight. Grate in the apple, add the yoghurt and stir to combine.

Tuesday, September 27, 2011

Crab Cakes with Fennel Remoulade

Every so often I decide that my stack of food magazines is getting out of control and I sit down (snacks on hand) to flick through them, tearing out any interesting recipes as I go. The scraps are then pasted into a sketchbook for future reference. As a general rule, I will only tear out something that strikes me as innovative or inspirational in some way, but this recipe, although nothing new, just grabbed me as a perfect starter for Wednesday night’s 3-course dinner.
I am always a bit reluctant to eat crab any other way than with thin brown toast and a little good mayonnaise and salad but I gave these cakes a whirl as the recipe is so simple that the flavour of the crab seemed sure to sing through – and it did, as did the texture. So here is the recipe, along with the remoulade, which is adapted from Olive magazine.
Crab cakes with Fennel Remoulade
250g cooked white crabmeat
1.5 tablespoons good mayonnaise
1.5 tablespoons flat-leaf parsley, chopped finely
1 egg, beaten
3 spring onions, chopped finely
Fresh breadcrumbs
A good knob of butter
For the remoulade
One bulb of fennel, finely sliced
1 small onion or 2 shallots, finely sliced
A small handful chopped flat-leaf parsley
4 tablespoons good mayonnaise
1 tablespoon wholegrain mustard
1 dessert spoon caper berries, chopped
1 tablespoon cornichons, chopped
Juice of 1/2 large lemon
- Mix together the crab meat, mayonnaise, spring onion and parsley.
- Form into 6 cakes and dip into the egg followed by the crumbs. Allow to rest in the fridge for at least 30 minutes to firm up.
- Mix all the remoulade ingredients together and set aside.
- Fry the crab cakes in butter for around 2 minutes each side until golden brown.

Monday, September 26, 2011

Watermelon and Vodka Sorbet

This recipe was inspired by my student days; vodka watermelons were very popular around that time and we spent days force funnelling the things until they were suitably saturated with the cheapest liquor we could find. A supermarket ‘basics’ brand or Glen’s being our budget poison of choice.
My tastes are a little more sophisticated nowadays (I said a little) and I’d like to tell you nothing but the finest went into this recipe but the truth is that the end of a bottle of Smirnoff was languishing so I used that. The vodka flavour wasn’t exactly pronounced though so my advice is as follows: get yourself a decent bottle then add a wee slosh on top of the sorbet in the bowl. Total refreshment, with a punch. Phwoar.
Watermelon and Vodka Sorbet
1.2 kg watermelon (that’s how much mine weighed after I’d removed skin and seeds)
3 tablespoons lime juice
200g caster sugar
3 tablespoons vodka, plus extra to serve
A few slivers of mint leaf, to serve (optional)
Cut the watermelon into wedges and remove the flesh from the skin with a knife. Chop into large slices and do your best to remove the seeds (the mixture will be passed through a sieve later so don’t worry about a few stragglers).
Put the watermelon chunks in a blender with the sugar and lime juice and blend to a liquid. Now pass it through the sieve into a bowl. Try to push as much of the melon pulp through as possible, not just the liquid. Churn the mixture in an ice cream machine until sorbet-like. Mine took about 20 minutes but my watermelon was well chilled, it could take half an hour.
To serve, let it rest out of the freezer for a good 10 to 15 minutes, otherwise it will just break up like a granita when you try and scoop it. Dribble a little vodka into the bowl and scatter on the mint, if using.

Sunday, September 25, 2011

Piri Piri Chicken

The grilling season is upon us. I’m excited. The summer stretches out in front of me like one long BBQ sizzling with stuffed squid, beer-can duck, tikka, grilled pineapple salsa, sardines, smoky baba and of course, plenty of jerk (top tips for great jerk here).
Portuguese piri piri chicken is something I’ve been meaning to experiment with for a while. We’ve survived the winter by ordering from Na Pura in Nunhead. The chicken there has a good flavour and is cooked well but I do wish they’d use better quality birds. They also take forever to cook them. After a batch of wings and a chicken or two I’ve hammered down my own recipe and the time has come to say that I’m sorry, Na Pura, but your services are no longer required.
My piri piri sauce is a combination of shed-loads of fierce little chillies, oregano, paprika, garlic, vinegar, oil and sugar; the sweet/sharp balance makes it perfect for the BBQ and BBQ’d it must be because char is very important for this recipe. The skin should be blackened in places. The vinegar in the marinade tenderises the meat keeping it juicy and moist inside. The other important thing to remember is to keep a pot of marinade and a brush to hand when grilling; brush the bird liberally and often. When she’s done, give her a final coat before serving with wedges of lemon and a big salad. And a beer.
It’s nice to serve a pot of the sauce at the table with a little brush, like Restaurante Bonjardim in Lisbon.
Piri Piri Chicken (makes enough for 2 chickens)
30 piri piri or other small red chillies (obviously you may need to adjust the amount according to the chillies you have available)
3 teaspoons dried oregano (fresh would be lovely but it’s quite hard to find around here)
2 level tablespoons paprika
150ml red wine vinegar
200ml olive oil
6 cloves garlic, crushed
2 tablespoons soft brown sugar
Salt
Chicken (see instructions on spatchcocking at the end)
Whack everything in a blender until smooth. Pour half of the marinade over your meat, cover and refrigerate overnight. Turn the bird around in the marinade every now and then. When it comes to grilling your bird/s, get the coals white hot then move them to the edges of the BBQ and put your chicken in the middle. Brush regularly with the marinade. Cook until the skin is blackened in places and the bird is cooked through (about 15-20 mins per side for a spatchcocked chicken).
Brush again with the marinade before serving.
If you’re cooking a whole bird on the BBQ, spatchcock (butterfly) it to ensure it cooks fast and evenly. To do this, place the bird breast-side down on a board, with the tail towards you. Using scissors, cut along each side of the backbone to remove it (this requires a little welly as you’re cutting through the ribs but it’s not that difficult). Turn the bird over and use the heel of your hand to push down on the breastbone so that it’s all one thickness. Use skewers to secure the legs and keep the shape of the chicken by pushing them through the thigh and then diagonally through the breast. A bird will take 15-20 minutes per side. If you want to see someone doing it there are some good vids on youtube.

Friday, September 23, 2011

Mango Sorbet

That’s 3 different types of mango, not 3 individual fruits. I’m into combining different varieties of the same ingredient to maximise flavour, such as 2-garlic soup and this cheese and onion tart which uses 3 types of onion. While browsing around in Peckham the other day I noticed the variety of different mangoes available. I usually stick to Alphonsos when making sorbet but these other types were so cheap I couldn’t resist; basically because they were so ripe they were on the edge of going off. Perfect for making sorbet.
I wondered if the 3 varieties (help in identifying them please; there are thousands out there, I got confused) would combine to make one super-intense mango flavoured sorbet. The answer to this question is a whopping great yes. My boyfriend and I ate half the tub the first time we opened it which only leaves the other half for tonight. I am uncomfortable with the thought of being without the sorbet.
There’s something about mangoes which make them better than other fruit for sorbet-ing; they give a very silky-smooth texture which is more like ice cream than sorbet. Extremely satisfying. It’s relatively healthy too, using only 100g sugar. The rest is pure fruit and lime juice.
I should say that I made this in my shiny new Cuisinart ICE30BCU ice cream maker, which Cuisinart kindly sent me to try out (I’m a total whore when it comes to accepting kitchen kit for review). My old ice cream maker was a Magimix Le Glacier 1.1, which did my head in, not least because it had a tiny yet essential part which I (and loads of other people) lost on a regular basis. The Cuisinart model is large in comparison, but with a welcome sturdyness. It also has only 4 parts, large parts, which are easy to fit together. The bottom bowl still goes in the freezer but when it’s on, the bowl turns, not the paddle. This makes it much less likely to break. It takes no time to churn. In short, I love it. And that’s not just because it was free. If you don’t believe that last bit, you can see what I said about the free breadmaker.
So there.
3 Mango Sorbet
Er, 7 mangoes like the ones above. Sorry I didn’t weigh the flesh. The mangoes in the middle are the ones you would easily find in supermarkets, to give you an idea of size. Quantities won’t matter too much though, just get yourself a variety of mangoes.
3 limes
100g icing sugar
Scoop the flesh from the mangoes into a blender. Add the sugar and lime juice and blend. You could then pass the mixture through a sieve to remove any fibrous bits but I didn’t bother. Tip into an ice cream machine and churn until frozen.
If you don’t have an ice cream maker, tip the mixture into a freezer-proof container and freeze. After a couple of hours, remove from the freezer and blend again. Freeze again. If you have time, repeat the process once more.

Thursday, September 22, 2011

Eating in Puglia

I’ve just come back from a week in Puglia, specifically the Itria valley, which encompasses the provinces of Bari, Brindisi and Taranto. The area is noted for a distinctive architectural feature, the trullo; a conical shaped stone roof designed to cool in summer and insulate in winter. Our villa, Trullo Tranquillo was located just outside Ceglie Messapica in Brindisi, hidden away in a labyrinthine network of narrow dirt tracks. Being tucked away like this was not a bad thing, although it did define the way we shopped and ate while in Puglia. I thought it might be of use to others who want to visit the area if I share my experiences of shopping and eating here.
With no restaurants within walking distance of our villa and only 2 drivers among 9, all of whom harboured a desire to get drunk, opportunities to eat out were limited. Mostly we bought ingredients at local markets and cooked for ourselves. Our excursion to the town of Monopoli however, saw us busting bellies at Osteria Perricci.

There’s no menu here, an unexpected relief. Monopoli is a coastal town, so they just serve fish; “antipasti?” our host asked. We nodded. “Pasta?” Of course. “Fish? Grilled? Fried?” We ordered both.
First bruschetta, properly made. Ruby ripe tomatoes smooshed into garlic scrubbed toast. The tomatoes in Puglia are to die for.
Favourite antipasti were butterflied anchovies drenched in the ubiquitous (delicious) olive oil; meaty morsels of octopus and sweet mussels bathing in grassy pools of their own juices mixed with, you guessed it, lots of olive oil. A couple of duds didn’t spoil the fun at all; battered fish was, for me, all bready batter and little fish. Sundried tomatoes were chewy as ever, although the accompanying chunks of cucumber rocked; a sweet, round variety that tastes like a mild melon.
Huge bowls of pasta next – ‘fish’ spaghetti, predominantly octopus and squid in a tomato sauce which tasted of shellfish shells, silkily bound with cooking liquor. The second, not the Orecchiette typical of the region but similar in shape (I think Cencioni), delightfully chewy, the sauce packed with garlic and white wine, the bowl clattering with mussels and sweet clams. Chillies were added at table.
The owners don’t speak much English at Osteria Perricci but they’re very friendly and make it easy to get by with gesturing, nodding and piss poor attempts at speaking Italian. Our meal came to around €25 a head I think, including a few beers and a bottle of wine. You can walk it all off around Monopoli afterwards too; the old part of town is well worth a look.

coca cola with deep-fried pickles


As you can probably tell, I’m into American food at the moment; perhaps the pulled pork with Boston baked beans or wedge salad with blue cheese dressing gave it away? Cooking ham in coca cola is one of those ideas that sounds just outrageous but is actually brilliant. I’ve cooked it many times now. The cola imparts, as you would expect, a sweet and subtly spiced flavour to the salty ham and I finished it with a sticky glaze of molasses, mustard and rum, which melted into a glistening varnish.
While pondering how to eat it (it takes 2.5 hours to cook, I pondered a lot), my thoughts inched ever closer to the idea of a towering sandwich; a Man vs. Food style beast topped with deep fried pickles and hot sauce. Yes, deep fried pickles. I first saw this genius idea on Homesick Texan, a blog partly responsible for this American food phase. Pickles? Good. Deep fried stuff? Gooood. Together? BOOM! I decided on a combo of traditonal dill pickled cucumbers (I always use the Krakus brand since my friend’s Polish mother recommended them – so crisp), pickled chillies and those sweet little silverskin pickled onions which are totally under-rated. A crunchy cracker base (base, base, base) mixture surrounds juicy, crisp pickle. They made an excellent snack and a serious sandwich garnish that says I Mean Business.
The ham was easily torn apart with frantic fingers and stuffed, chunk on juicy chunk into a roll. We topped each with a selection of the pickles and sauce made with 50% home-made hot sauce and 50% ketchup. Oh my. This is what Sundays are all about.
Ham cooked in coca cola with a molasses glaze
1 x 2kg ham. Mine was was just over this weight (I used a boneless one; a bone will add more flavour but you need to account for the weight)
1 x 2 litre bottle full-sugar coca cola
1 white onion, peeled and cut in half
For the glaze
100ml molasses
2 tablespoons sugar
2 tablespoons Dijon mustard
2 tablespoons dark rum (or whisky)
Cloves
Put the ham in a large pan, skin side down. Cover it with the cola and add the onion. Bring to the boil then reduce to a good simmer. Put a lid on, but not tightly; rest it so you have a teeny gap at one side. Cook for 2.5 hours (or just under if your ham is exactly 2kg).
When the ham is nearly finished cooking, preheat the oven to gas 7/210C
When the cooking time is up, drain the ham, put it in a dish then remove the skin so that you are left with a thin layer of fat. Score the fat into a criss-cross diamond pattern. Mix the glaze ingredients together well and brush the glaze all over the ham. Push a clove into the points of each diamond. Cook it for 5 minutes, then brush again with the remaining glaze. Cook for a further 5 minutes then remove the ham from the oven and allow it to cool.
Deep-fried pickles
5 good sized Krakus brand pickled cucumbers, cut into inch-thick slices
6 pickled chillies
6 silverskin pickled onions
1 egg
1/2 cup buttermilk
1/2 pack Matzo crackers (about 75g. Matzo are very similar to the ‘Saltines’ that Homesick Texan uses)
1 scant teaspoon paprika
Salt and pepper
Flour
Vegetable or groundnut oil, for deep-frying
Preheat the oven to Gas1/140C
Cover a plate with flour and sprinkle with pepper and paprika. In a bowl, mix the egg and buttermilk. Put the crackers in a food processor and pulse to crumbs; spread this mixture on another plate. Dip each pickle first in the flour, then the egg, then toss about in the crackers. Set aside. Heat your oil for deep frying in a sturdy pan until it shimmers. You can test if it is ready but putting a little piece of bread in – if that starts to properly sizzle and fry, you’re good to go.
Fry the pickles in small batches; do not crowd the pan. Put the cooked pickles on a plate lined with a couple of sheets of kitchen paper and put in the oven to keep warm while you cook the rest.

Tuesday, September 20, 2011

Hickory smoked hot wings with sour cream slaw


The first time I made hot wings they were good, but not hot enough. I wanted try again using the authentic, not very secret ingredient, Frank’s Original Hot Sauce. I also wanted to try my hand at smoking them so I sensed the opportunity for an Amazon binge and bought: 3 bottles of Frank’s, a tub of Old Bay Seasoning, a Weber chimney starter and a pack of hickory wood chips.

I would encourage anyone who owns a half decent BBQ with a lid to buy some wood chips for smoking immediately, if you haven’t already. There were almost tears of joy when we lifted the lid to find a rack of wings turned orange with hickory smoke; I was amazed at the results you can achieve with just a regular home kettle BBQ.
I’d marinated the wings overnight in herbs and seasonings, then smoked them for 25 minutes a side over indirect heat with the hickory chips thrown in. They emerged crisp and burnished brown, ready for a good plunge into a combo of Frank’s Original and melted butter before going back on the grill, over direct heat for another 20 minutes. To finish, a final lick of that sauce and straight onto the plate.

The smoking, together with the sweet, vinegar-chilli punch of Frank’s (it’s like a thick Tabasco) cut with velvety butter, makes the flavour incredibly intense – not to mention sticky. A mound of discarded kitchen paper stained orange with sauce rose before us as we worked our way, just the 2 of us, through 24 wings.

It seemed appropriate to cut the heat and umami with something a little sharp, a little creamy; a cool, crunchy pit stop between wings. Slaw. This is a classic mix of carrot, white cabbage and red onion; the sauce a mix of sour cream, natural yoghurt, a smidge of American mustard and my secret ingredient – a slosh of juice from a jar of dill cucumbers, which adds a lovely spiced-sweet pickled note.
Later on, we deep-fried more pickles and shoved them into a sandwich with shredded wing meat and slaw. So gluttonous. So unhealthy. So. Good.

Monday, September 19, 2011

Mussels with Bacon

Clack, clackity clack; I love the sound of mussels being stirred in a pan. It’s one of the best kitchen sounds in my opinion, up there with The Sizzle and The Plop. In fact, I don’t know why I’m not eating more mussels when they’re cheap (£3.50 per kilo from Soper’s in Nunhead) and they cook really fast.

I’m also drawn to them because they just love to be cooked with a bit of booze. I like that in my ingredients. A splash of white wine of course is essential in moules marinières but I wanted something different and one of my favourite beers immediately sprang to mind: Punk IPA by Brewdog. It’s an astonishing beer, really. The first time you drink it your eyes go wide with shock at just how different it is from all the others; at once bitter and sweet, it has a floral flavour that really works well with the mussels.
A big bowl of mussels is of course extremely good fun to pick through, made all the better by the knowledge that you’ve got a loaf of good bread to sop up those juices.
The very best thing about this recipe though, is that Punk IPA cans come in packs of 4, so you can drink the other 3.
Mussels with Bacon and Punk IPA
  • 1kg fresh mussels
  • 1 stick celery, finely chopped
  • 1 white onion, finely chopped
  • 4 rashers thick cut smoked bacon, diced (get some nice bits of fat in there)
  • 1 clove garlic, crushed
  • 1 can Brewdog Punk IPA (you can buy it from Sainsbury’s, Morrison’s and Utobeer in Borough Market for the Londoners. Also, online in bottles).
  • 1/2 lemon
  • Small handful parsley leaves, roughly chopped
Crusty bread, to serve
Put your mussels in a colander and scrub them under cold running water to remove any dirt from the outside. Knock off any barnacles you can and remove any gritty beards by pulling them. Discard any mussels which do not close when you give them a sharp tap on a hard surface and also any that have broken shells.
Heat a little oil in a pan large enough to hold the mussels and add the bacon, onion, celery and garlic and cook, stirring until the bacon is beginning to crisp up. Add the beer and some black pepper and bring to the boil, then add the mussels. Put the lid on and cook on a high heat for about 5 minutes, giving the pan a shake now and then, until the mussels have steamed open. Discard any mussels that don’t open.
Sprinkle with the parsley, squeeze over the lemon, and serve with the bread.

Chorizo and Spring Greens Broth with Sherry

There is a large leafy thing in my vegetable box. I’m not quite sure what it is and so I check the website. According to the suppliers, these are spring greens. I had honestly never noticed that we get spring greens in September. I sent a quick e-mail to Abel and Cole, just to make sure, and this is their response.

“Spring greens are apparently so named because their ability to withstand cold winters is valued for an early Spring supply of edible leaves in what is commonly known as the “hungry gap” – the period when winter’s crops have all been harvested but the next season’s crops are not yet ready.”
So there you go, what a marvellous Brassica they are, keeping us going through our hungry gap and what a fab company Abel and Cole are, so friendly and efficient. And while I’m on a gush, this is a great recipe, even if I do say so myself.

Chorizo and spring greens broth with sherry (Serves 4)
1 large onion, finely chopped
2 cloves garlic, crushed
2 chorizo sausages
1 head spring greens, finely shredded
2 medium potatoes, diced
A generous splash of dry sherry
700 ml chicken stock
Salt and pepper

1 tablespoon olive oil
- Heat the oil in a saucepan and sauté the onion and garlic for 30 seconds, before adding the sherry.
- Cook every thing for another couple of minutes until soft.
- Add the potatoes and chorizo for a few minutes until golden.
- Add the stock, season and cook for around 10 minutes until the potatoes are really soft.
- Mash the potatoes into the soup a bit if you like (I did), bring back to the boil, add the greens and simmer for around 5 minutes until tender.
- Serve with crusty brown bread.

Wednesday, September 14, 2011

Spiced rum and apple cake


It’s not very often my thoughts turn to cake but when they do, those thoughts generally include spices and booze. And fruit. My boss collected a big bag of cooking apples from her garden which I raided for the best specimens, leaving all the bruised and maggoty ones for my colleagues. They could moan about that, but then I gave them cake so I think I got away with it. See what I did there?
This is a very squidgy cake. The apple chunks are tart but this is a very good thing because the cake is quite sweet. I spiced it with allspice and rather a conservative amount of cinnamon which could easily be increased if you are more into it than I (e.g. you are American). I finished it with a glaze of rum and butter which seeps into the cake while still warm, hence all the little holes in the surface. It’s a very moist, boozy, sharp/sweet cake which would be very happy sitting underneath a blob of creme fraiche, alongside a cup of tea. I’m rather annoyed that it looks a little dry in the picture below, on account of its being so damn squidgy, but I weighed this up against your potential frustration at not being able to see the inside of the cut cake, so here it is…
Spiced rum and apple cake recipe (based on this recipe)
(fills 1 x 20cm springform cake tin)
125g butter
2 eggs, lightly beaten
225 plain flour
225g dark muscovado sugar
2 teaspoons baking powder
1 teaspoon cinnamon
1 teaspoon allspice
500g cooking apples, peeled, cored and diced
For the glaze (I only used half of this in the end)
3 tablespoons rum (the better the rum, the better the cake, obviously)
50g butter
50g sugar
Heat oven to 160/fan140/Gas 3
Butter a 20cm springform cake tin and line the bottom with baking paper.
Cream the butter and muscovado together in a food mixer (or by hand if you don’t have one), then mix in the egg. Sift over the flour, plus the spices and baking powder. Fold the mixture together, then add the apple. Mix it in. Pour the mixture into the tin and bake for 40 mins-1 hour, or until golden and risen.
To make the glaze, melt butter, sugar and rum together in a small pan. When it starts to boil and thicken slightly, it’s ready. Remove from the heat and allow to cool.
When the cake is cooked, remove from the oven and allow to cool for 10 mins in the tin. Poke holes all ove the top of the cake with a skewer, then brush on the glaze, letting each bit soak in before adding the next. I only used about half this glaze.

Saturday, September 10, 2011

Let’s Cook: Kale Waldorf Salad

  The combination of apples, walnuts, celery and grapes in Waldorf salad is a classic. Here Healthy Eating Chef Chad shows us how to keep that traditional creamy dressing without using any mayonnaise (watch to find out the secret!) and adds kale instead of lettuce to give it a punch of nutrients. Then try it at home with this Kale Waldorf Salad recipe.

Friday, September 9, 2011

Okra pachadi

Most of the recipes on this blog are my own, but sometimes I want to share others I’ve stumbled across, or those that people have sent to me. This pachadi recipe comes from Sharmila, a local food blogger who does Very Good Things with yoghurt and okra.
In my limited experience, a pachadi appears to be a base of yoghurt and vegetables, topped with a mixture of tempered spices; like pouring a tarka over a dahl. It’s clearly South Indian, as mustard seeds and curry leaves feature heavily in many recipes. My first chapadi experience came via Flickr when one of my contacts posted a recipe so unusual to my eyes that I had to have it. Mustard seeds, dried chilli and curry leaves are fried briefly in coconut oil until the seeds pop then mixed with yoghurt and cucumber. It’s hard to resist bombing a hot chapatti into the still-sizzling spiced oil. The flavours will have you on the edge of your seat.

Sharmila’s version is made using okra slices, fried until crisp; a beautiful contrast against the chilled yoghurt. It takes minutes to make and I can particularly recommend it as part of a ‘curry day’ extravaganza; nargisi kofta curry, chicken tikka and this excellent spinach and paneer dish from Das Sreedharan’s hugely under-rated book, ‘Indian’*. Yes, I know I go on about that book all the time.
Okra pachadi
1 teaspoon black mustard seeds
10 or so curry leaves
2-3 green chillies, chopped into a few pieces
Chilli powder
Lemon juice
Coriander leaves
Two large handfuls of okra, chopped up into smallish (2cm pieces)
Natural yoghurt
Salt to taste
Groundnut oil
Fry the okra in a few tablespoons of groundnut oil until nice and crisp. Drain on kitchen paper.
Combine the okra with the yoghurt (about 200g) and a bit of chilli powder (but not too much – this isn’t a spicy dish). Fry the mustard seeds in a small pan in a tablespoon or so of oil. When they start to pop, add the green chilli and curry leaves. When they are nicely sizzling, pour over the yoghurt mixture. Stir to combine, add salt and lemon juice to taste and then add the coriander leaves.
* The edition of Das’ book that I have doesn’t seem to be available any more but this looks very similar and I imagine will have a lot of the same recipes. It’s one of those books you actually cook from rather than just flick through.
Thanks again to Sharmila for the chapadi recipe.

New baba ganoush recipe

  The way to get good at cooking is to go at recipes over and over, not flit around from one place to another and never look back.
I ate a stunning baba ganoush at Maramia Cafe recently as part of a ‘lamb banquet’ organised by Carla. The meat was soft and tasty as hell, but the baba was what really blew people’s minds. It was thicker than mine; I wondered how they’d achieved the consistency and considered straining the yoghurt. I’m a serial strainer – you end up with something almost cream cheese-y but way more refreshing. I tried using it in the baba and the result was of course, richer. I’ve also started using smaller aubergines, which means that the smoke can penetrate all the flesh, rather than just the outer layer.

That’s it really – makes all the difference.
Baba Ganoush
8 small aubergines
2 cloves garlic, crushed
2 lemons (juice)
1 handful mint leaves, chopped
1 handful coriander or parsley leaves (or a little of both), chopped
6-8 tablespoons tahini (I like a good whack but you may want less)
1-2 tablespoons pomegranate molasses
Salt and pepper
4 tablespoons olive oil (not extra virgin)
4 tablespoons strained yoghurt (see below)
First, strain the yoghurt. If you don’t remember to do this the night before it doesn’t matter, even a couple of hours will make a big difference and the process itself takes seconds of preparation. Take a 500g tub of decent Greek-style yoghurt such as Total. Full-fat will obviously taste better than low fat but the latter does work okay. You’ll need some butter muslin, which is available from hardware stores easily. Cut a square of the muslin and line a bowl with it. Mix the yoghurt with a scant teaspoon of salt, mix well, then dollop it all into the middle of the muslin in the bowl. Gather it up, tie string around the top then tie the other end to something (I use a kitchen cupboard handle). Leave it for a few hours or ideally, overnight with the bowl underneath.
Pierce the aubergines with a fork and place directly on the gas rings of a hob (1 per ring) on a low flame, or put them under the grill, turning occasionally until blackened all over and collapsed. They will burst but this is fine, it just requires a bit of attention so you don’t lose the flesh. Remove to a plate and let cool slightly, then scrape the flesh from inside, leaving any bits of blackened skin and liquid on the plate behind.
Blend with all the other ingredients and season and adjust as necessary. You may want to add more lemon, yoghurt or salt for example.
Allow to sit for a few hours before serving with hot flat breads or pitta for scooping.

Tuesday, September 6, 2011

Serious sandwiches

  I’m a sandwich fanatic. Rarely does a day pass by sandwich-less; often I’ll grab a slice of bread with a meal and stuff whatever is on my plate into it. There’s something so satisfying about biting down on a well-made slice; the countless contrasting combinations within; the carb fix; the convenience. So, my current top 5 Serious Sandwiches:
1. The Mexican Torta (top). I first came across this in Thomasina Miers’ book, Mexican Food Made Simple. It’s basically a big party of Mexican tasty all stuffed into a sturdy ballast of bread; probably the messiest sandwich I’ve ever eaten. Mine was packing: guacamole; tomato salsa; grilled chorizo; smoked chicken; refried beans; lettuce and smoked scotch bonnet mayo. One of the most delicious and gut-busting sandwiches I’ve ever eaten. I had to lie down on the sofa afterwards, like a giant beached blimp.

2. The BLAT. Bacon, lettuce, avocado, tomato (sometimes a cheeky touch of spring onion). A hangover stalwart for the past goodness knows how many years. Proper bacon is essential; none of that supermarket shite. My avocados of choice are those massive ones you can find easily in Peckham. Hass are otherwise good, if you can actually find a ripe one.
2.1 A sneaky extra coming in at number 2: the BLT with fried green tomatoes. This got made because I was kindly gifted a big bag of green tomatoes by Andre, which I sliced, coated in crumbs and fried, the American way. I’d heard somewhere that these are good in a BLT. They were. A nice crunchy layer of fried stuff in the middle of a bacon sandwich was never going to be a bad thing. That’s a remoulade on the bottom made with mayo, pickle brine and Frank’s hot sauce.

3. Ham cooked in cola with deep-fried pickles. Deep-fried pickles are the best thing to happen since regular pickles and deep-fried things that are not yet pickled. The ham was simmered in cola and glazed with molasses. I finished the sandwich with home-made hot sauce. Another day I deep fried more pickles, and okra, to make a sandwich with shredded, hickory smoked hot wings. Never dismiss the option of slinging in a few deep-fried pickles. Did I mention how brilliant the deep-fried pickles are? The deep-fried pickles are very good. This is an important message.

Friday, September 2, 2011

Chocolate Raisin Walnut Pie


This Chocolate Raisin Walnut Pie Recipe, from Andrea Spring of Bradenton, Florida, won the First Place Raisin Category and Best in Show in the Professional Category at the 2010 American Pie Council Crisco National Pie Championships.
Thanks to the California Raisin Marketing Board for allowing us to use this recipe and photo.

Prep Time: 25 minutes
Cook Time: 30 minutes
Total Time: 55 minutes
Yield: 8 Servings
Ingredients:
Crust:
1/4 cup plus 2 tablespoons shortening
1/4 teaspoon distilled white vinegar
1-1/2 teaspoons milk
2 tablespoons hot water
1 cup all-purpose flour
1/2 teaspoon salt
3/4 teaspoon cornstarch
Filling:
1 cup California raisins
3/4 cup milk chocolate chips
3/4 cup chopped walnuts
3 eggs
2/3 cup granulated white sugar
1/4 teaspoon cinnamon
1 teaspoon vanilla extract
1/3 cup melted butter
1 cup dark corn syrup
Preparation:
In small bowl, combine shortening, vinegar and milk. Add hot water; mix well. In medium bowl, mix together flour, salt and cornstarch. Add shortening mixture. Mix until dough forms. Wrap dough in plastic wrap and let stand in refrigerator for at least 1 hour.
Then, roll out dough to fit 10-inch pie pan. Arrange in pie pan and crimp edges. Sprinkle and spread raisins, chocolate chips, and chopped walnuts evenly over bottom.
Preheat oven to 400 degrees F. In large bowl, mix eggs, sugar, cinnamon, vanilla, butter and corn syrup until well blended. Add chocolate chips and walnuts; mix well. Carefully pour over raisins in pie crust. Bake at 400¢ªF for 10 minutes. Reduce temperature to 350 degrees F and bake until center of pie is set; about 30 minutes.